Everyone who is even slightly interested in fashion trends in hair coloring, have heard of such techniques as highlighting, ombre (amber) sombre, feathering, booking, toning, coloring etc. However, today Balayazh is at the peak of popularity.
Balayazh - This is an open hair coloring technique, that is, foil or film is not used. Lightening powder is applied only on the upper part of the strand, while the master forms a certain pattern. The average thickness of the strand is 1-1.5 cm.
Hair dyeing in balayazh style
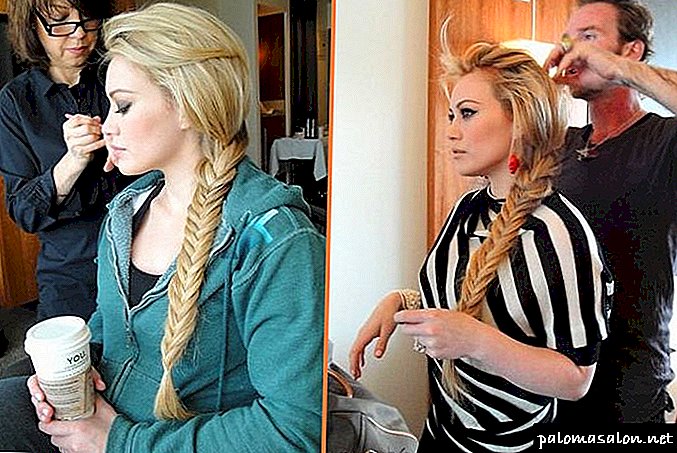
Literally "balayazh" means "to sweep." Actually, the technique of applying paint is fully consistent with its value. This technique creates an effect. burnt hair. The coloring process starts with tipsthen the paint is applied on the roots and the master sweeps it gradually over the entire length with a special brush. This is a smooth color transition. This technique looks the most advantageous on the shade of blond color. Less often you can see balayazh on dark hair and balayazh on light brown hair - a photo, as this type of coloring does not look so impressive on dark shades. Streaked chestnut curls can often be stained darker or lighter.
This type of staining is recommended at least once. good master. Next, you can refresh the color at home. I can safely say that balayaz - one of the most gentle staining methodsbecause it runs without foil.
This method also has species that differ in the method of applying paint. But the goal of each of them - create the effect of natural sunlight. Among the brown-haired women booking is very popular. This type of coloring makes it possible to look like a celebrity, because you can make beautiful, natural colors, creating additional volume and relief.
Classic way creates smooth transition from dark to light. For technology, the difference is only three tones.
Shatush - creation technology the most natural effect of burnt hair. Good for both light curls and black. The master divides hair into thin strands and combs each of them. Paint is applied in light strokes to create a natural look. It should be borne in mind that the application of paint on straight strands is different from the application on curly curls.
Dark hair balayazh - photo for inspiration
On the darkcurls looks interesting technique Venetian highlighting. At home, it is unlikely to be able to apply the paint so neatly. This is a gentle way of coloring, as it is done without foil. Paint applied with a brush full length or in a certain part of the head. The main thing in this way is a creative approach to creating a pattern on the hair.
Blond hair balacek - photo
On light locks beautifully looks one of the technician balazhezh - Californian highlighting. The goal is to achieve a smooth transition from dark roots to bright tips. Among the techniques are also known species such as degrade, flame - smooth transitions of color from dark to light.
Short hair coloring
Than shorter haircut, the more experienced should be the master. After all, the long strands are not as clearly visible inaccuracies in the application of paint, as on short hairstyles such as bob, elongated square. The same applies to painting in the style of balayazh - painting with bangs. The front bangs are constantly visible, so any errors will immediately be evident.
Balayazh - coloring at home for beginner hairdressers
Painted hair in the style of balayazh requires from the master certain skills in the treatment of colors. Besides neatness when working with the material, the specialist must think carefully tones of colors for a certain color of hair. After all, they should be as close as possible to the original color in terms of color type.
If painting is done independently, on the table we will need:
First well combing curls. We put on gloves and proceed to paint mixing. Combed hair need divided into even four parts and secure with hairpins. The ends of each of the strands we paintso as not to hurt the rest strands. We stand the time, as indicated by the instruction. Wash off neatly with tips and treat with balm. This is a way to dye your own long curls. For shorter ones, you should ask for help.
There is another scheme to paint itself, without leaving home. Independently well it turns out to make a color on elongated and medium length (shoulder length) hair.
The procedure consists of the following steps:
- collect strands in high beam,
- not observing a clear boundary, put on clarifier tips, (we don’t touch the roots),
- for good color contrast on dark curlsneed 9% oxidizer,
- ends with an oxidizing agent wrap in foil for 15 minutes,
- wash your hair and dry(the tips will be reddish)
- since the color is terrible, the ends need to be toned,
- a gentle paint is selected and applied to the ends for up to 15 minutes,
- after washing the head is recommended to apply restoring mask.
Of course, the effect may not be exactly the same as after the salon. But, if you learn, you can well save on salon procedures, the cost of which many can not afford.
Step-by-step photo for home painting in balayazh style
On the Internet you can find a lot of photos already done staining method, as well as photos step by step for home painting in balayazh style. Just a few months ago, Internet editions of fashion and beauty filled in photos of melirored, colored curls of unthinkable and extraordinary shades. Hairstyles for long hair were especially brightly filled, where in balayaazh waspink shade. The best combination of this color will be on white and ash tone. Balayad in red color will look good on red hair, but Blue colour - on black.
Video tutoring technique balayazh
If painting is supposed at home then it is desirable to study the video lesson of the balazhig technique on the YouTube channel in Russian + description.
Whatever it was, and balayazh technique - This is the most gentle method of painting. If hair can't boasthealth and brilliancethen this is an alternative method to bring them in order.
Varieties and types

In the photo balajazh on red medium and long hair.

In the photo balajazh on light brown hair.

In the photo balajazh on black hair.
Advantages and disadvantages
To the undoubted pluses Balayazh staining techniques include:
 balayazh not very complicated in order to make it at home,
- You can do this coloring on almost any hair - short and medium, dark, light, red, straight and curly,
- in comparison with some methods of coloring, balayazh does not take much time,
- balayazh will suit both young girls and mature women - with its help it is good to paint and mask gray hair, to divert or draw attention to any part of the face, creating an accent on it,
- it is not necessary to correct the coloring too often after the balayazh technique - the regrown hair roots will look quite harmonious in a month or even more.
 balayazh not very complicated in order to make it at home,
But there are minuses:
- in a salon or a barber shop, you will have to pay a lot more than for simple dyeing or classical highlighting of hair,
- for very fair hair, balayazh make harder,
- even if you do a balayazh in the salon, you have no guarantee that your hair will look the same as on the “star” photos, and that you will be satisfied with the result.
What is staining balayazh
The term "balayazh" is derived from the French word balayage (Russian smear, stroke). This is a special fashionable coloring technology, also known as “star”, because it is very popular among Hollywood celebrities. Balayazh is close to an ombre and a shatusha, since it also represents a transition from one shade to another, but assumes greater naturalness and negligence.
The hairdresser applies paint with strokes and makes a big stretch, so as a result, there are no stripes and a “dirty color”. A lightweight hairband on blond hair often looks like it just blew out a little in the sun. The ability to get a natural shine and visually increase the volume of hair - that is what attracts lovers of this type of coloring. Another advantage - hair can grow back, but the hairstyle will still look neat.
When dyeing balayaz master never touches the roots, and always completely handles the tips. For long hair stretch turns out more, but there are no specific boundaries. You can paint at your discretion - very little or almost completely. This moment is previously discussed before the procedure with the master (if done in the cabin), or determined independently (if at home).
Who is suitable
The technique of dyeing balayazh is considered sparing, therefore it is suitable even for owners of thin and porous hair. Due to the effect of faded strands, a visual volume will appear. In addition, staining will solve the problem of fragility and lack of gloss (but also only visually, because additional care is still recommended). Balayazh on short hair looks very good, it suits blondes wonderfully.
Although this type of coloring does not impose strict requirements for a haircut, the cascade or ladder (of any length) is considered the most advantageous option. A new hairstyle will look impressive, if you do a balayazh not on straight hair, but on wavy hair (if nature has not made you curly, you can always fix it with a perm). They will help to place the necessary accents of glare on a classic square or bob.

On dark hair
Color shades are great for black hair (including neon), and also unusual gray or “ashy” color. For dark brown, as warmer, - wine, bronze and autumn foliage. Depending on the length and desire, you can select only the tips or dye most of the hair - in any case the hairstyle will look extraordinarily beautiful.
Brown-haired should look at honey and golden hues. Such a balayazh on average hair will look like a sun bunny on strands. Consider the warmth of the color: hazel blends well with a caramel touch, and nutty with coffee or chocolate. Of the color options, purple (lilac, purple) is considered to be universal - it suits almost everyone, moreover, is now at the peak of popularity.
Feature of technology
 Balayazh differs from most other techniques in that it is not the whole head that is stained, but only the lower third of the hair, with separately selected strands. This is the most gentle method, but it allows you to significantly change the base color or slightly shade it.
According to this technology, for painting to the base color (usually natural), select 2-3 additional colors in the same palette.
Balayazh does not allow sharp contrasts. It should look like a natural burnout of hair. Therefore, adjacent strands can not differ from each other by more than 3-4 tones.
In order to perform balayazh correctly and beautifully (especially on long hair), you need to know the basics of color, know the color stretching technique, be able to choose the right oxidizer and the dwell time of the paint, focusing on the state of hair. All this is well known to almost any hairdresser, and an uninformed person can make some elementary mistakes that will eventually lead to a negative result.
Choose style
Despite the fact that balayazh restricts us in choosing the colors, it has many varieties, which allows you to choose the most suitable style for any color type and length of hair.
Here are the most popular ones:
- Classical. Only the lower third of the head of color is stained, and the saturation of the additional color depends on the density of the spinning of the strands. Suitable for long and medium hair of any shade.
- From the roots. In contrast to the classical, the upper strands in the occipital and temporal zones are stained with an additional color, departing 3-5 cm from the roots. This allows you to perfectly mask gray hair and for a long time not to make a correction.
 Pearl Ash. These shades are not suitable for everyone. Women over 35 are better off not using them - they can add a few extra years. But if you have a naturally cold color type (winter or summer), such balaage will make you exquisitely stylish.
- Blond Although initially balayazh was done only on dark hair, barbers invented the technology of this dyeing and for blondes. The ends of the hair are brightened even more or, on the contrary, are slightly darkened, creating a play of light and shadow.
- Chocolate caramel. Ideal for light brown and light brown hair, and it looks great even on relatively short haircuts, such as a bob.
- Honey red. Such accents can decorate both blondes and owners of light brown hair of warm shades. They are suitable for those who are not afraid to look bright. But the red pigment is quickly washed out, so you have to regularly do toning.
- Supernatural. This type, when properly performed, is almost imperceptible. Very fine locks are stained with 1-2 colors, not more than 2-3 tones different from the natural one. As a result, only light play is obtained on the head of hair.
 Pearl Ash. These shades are not suitable for everyone. Women over 35 are better off not using them - they can add a few extra years. But if you have a naturally cold color type (winter or summer), such balaage will make you exquisitely stylish.
There are far fewer options on how to make a balayazh at home than in a salon shop, since it is difficult for a non-specialist to assess the condition of the hair and understand which style is best in this case.
Therefore, if you want to have an original and stylish hairstyle, you should still go to a good colorist.
Stages of implementation
If you decide to try balayazh at home, then prepare everything you need for the procedure and try to follow the instructions described below step by step.
Remember that the technique of dyeing short and long hair is somewhat different. And the dwell time of the paint should not exceed 35-40 minutes, otherwise you can seriously damage the hair.
Preparatory
 Any hair coloring is an effect on them with an aggressive oxidant that lifts the keratin scales, allowing the pigment to penetrate deeper. Natural fat helps to slightly soften the negative of the paint, so make the paint better on the dirty hair (if it does not have a thick layer of varnish and other styling products).
For staining you will need:
- plastic bowl and paint brush,
- chopped foil to wrap strands
- thick comb for root brushing,
- non-metallic clips for zoning,
- rare comb for combing paint,
- drape for clothes and gloves for hands,
- shampoo, balsam and towel.
Important! Everything must be on hand. The paint will have to be applied quickly so that the strands are painted the same. Therefore, there is no time to run and look for the missing tools.
Below is a detailed instruction on how to dye your hair in balayazh at home. Try to carry out all its stages clearly and make sure that the light paint does not fall on the roots and the upper part of the hair when applied.
 good to comb your hair, so that there is no confusion and wrinkles in length,
- divide the hair into zones: occipital, temporal, bangs,
- starting from the upper part of the occipital zone, select with a horizontal parting a thin strand,
- put on its tips a light tone, on the middle part - darker,
- carefully shade the borders between the colors and wrap the strand in foil,
- repeat staining in the temporal zone and bangs,
- after 10-15 minutes, comb the paint from top to bottom with a wide comb and leave for another 10 minutes,
- wash your hair well with shampoo, blot with a towel,
- apply restoring balm on wet hair,
- leave for 3-5 minutes, rinse, blow-dry hair and lay.
 good to comb your hair, so that there is no confusion and wrinkles in length,
This is a somewhat simplified balayazh technique at home, which can be used on medium and long hair.
Balayazh on haircuts
On very short haircuts balayazh do not. With the complete absence of length it is impossible to achieve color transitions. You'll have to grow a hair of at least 5-6 centimeters or choose a different style of coloring. In asymmetrical haircuts, an elongated zone can thus be distinguished. But it is better to let the master do it.
It looks good balayazh on haircuts pixie, cascades and all forms of square. On short hair, it is easy to do it yourself, if you very much comb the root zone. Then the finished beams are formed, which can be additionally fixed with varnish. Light paint is applied to their tips without foil. But this must be done very carefully so as not to lighten the roots.
 Consider the speed of hair regrowth. If you are going to continue to wear a haircut, then the painted parts will soon be cut off and the procedure will have to be repeated regularly.
But if you plan to grow hair in your plans, then balayazh is ideal to look stylish even with a not too neat hairstyle. He will create fashionable today easy chaos and the grown roots will look organically.
Damaged curls
It is better not to do balaazh on damaged by pre-clarification, frequent staining or permed hair. First you need to treat your hair a little or lamination, which will cover each hair with a thin protective film.
This type of coloring for small curls does not fit at all - they do not get smooth color transitions. Therefore, if you have recently done chemistry, have patience until the hair is restored after this aggressive procedure, and cool curls will turn into small waves.
Extra care
Dyed hair must be carefully looked after. If a healthy shampoo has enough quality shampoo and balsam-rinse, then damaged need masks and / or oils for the tips.
 Quickly restore shine, smoothing the surface of the hair, indelible sprays, which can be used daily.
Exposure to high temperatures on dyed hair is simply detrimental to them. The hair quickly dries out, loses shine, the hairs begin to break off. So try to give up hot styling or be sure to use products with thermal protection.
At any time of the year, protect your hair from sudden temperature changes and prolonged exposure to ultraviolet radiation.
It is enough to make the correction once in 2-4 months - it all depends on the speed of hair growth. To refresh the color and make the base shade more saturated, you can toned hair with a suitable dye shampoo. In order not to dry out the hair and increase the color stability, after toning, be sure to use a conditioner balm for dyed hair.
You will need:
 barber brush or sponge for applying paint,
- lightening paint or the one you chose - it should be lighter than your color a couple of tones,
- a pair of gloves,
- glass paint bowl
- clips or special hairpins to fix the strands,
- barber cape or something that will protect your clothes from possible paint splashes,
- foil (if the hair is medium or long).
 barber brush or sponge for applying paint,
In the photo you see all 3 stages of painting according to the balayazh technique. This is the preparation of the hair itself dyeing and the final result. Let us dwell on the first two.

Hair preparation
Comb your hair thoroughly with a fine tooth. Then divide the hair into strands. Some sources recommend using hair mousse to form separate strands with it, preparing them for coloring. You can do so.
 Still, it is more convenient to use small clips or hairpins of the "crab" type. With their help, you will certainly be able to securely lock the strands of short hair, giving them a kind of palm, as in the second photo.
When performing staining for long or medium hair is recommended to use foil. If the hair is of medium length, then the separated strands are covered with foil from the base of the hair roots - only the tip of each strand that you are going to dye sticks out.
Features of staining
Balayazh (from English - “sweeping”) is a simple and fast technique that allows you to get the beautiful effect of slightly burnt strands. With this method of coloring the curls are picked in a random order, so the result looks very natural.
Tip! To determine the number and location of strands for coloring, remember how you often burn out a hair.
The easiest way to do it is blond hair. First, they do not need additional clarification. Secondly, even if you do not get the perfect transitions, then on the bright head of hair it will not be so noticeable. But when dyeing on dark hair, you will need to try at least twice as much - they will have to be lightened, and only then painted.

In salons balayaz performed with the participation of 2-3 tones. They do not necessarily belong to the natural color palette. If you want a radical change, feel free to use blue, purple, green. Of course, with such a color you hardly get the effect of burnt hair - the result will be different, but still very stylish. For those who prefer naturalness, we recommend choosing the following tones:
- Beige,
- Cognac,
- Champagne
- Chocolate,
- Walnut,
- Blonde
- Caramel,
- Coffee,
- Chestnut.
In the salon version, two shades (main and lighter) are used with a very blurred border. In this case, the ends of the hair are lightened completely, and the vertical strands - only 2/3 of the length.

Important! The most common mistake is the wrong combination of shades. Do not forget that they must be either warm or cold. It is impossible to combine heat and cold in one hairstyle!
Coloring
Dilute the lightening paint according to the instructions. Now with a hairdresser's brush or sponge, apply paint on the tips of each separate strand - “palm”. Some hairdressers advise even to apply the paint on the tips manually - then you still need to slightly wrinkle them so that the clarifier lays evenly.
When dyeing on medium hair, it is recommended to use a sponge for applying paint, and then wrap each colored tip with foil. When working with long hair, the foil is enclosed when applying paint under each strand for convenience. The general conclusion is as follows - for short hair foil is not needed.
After applying, you can hold the paint on the hair from 15 minutes to half an hour. It all depends on how strong the effect of the burnt tips you want to achieve. Then wash off the paint with warm water and shampoo. Balayazh ready.
When it is justified to do it at home, and in which it is better to go to the salon
If the technique of staining balayazh did not seem difficult to you, then you may well try to do the balayage yourself at home.  If you have any experience with hair coloring or highlighting, then it is unlikely that you will have any difficulties.
Moreover, the technique itself suggests in the final result a certain randomness of the resulting bright highlights at the ends of your hair. That is, no one can say that it was not originally intended. Even on the Internet, it is difficult to find a photo of the unsuccessful outcome
But in Salon or hairdresser is still worth to go if:
- you have no skills in coloring, and you are not confident in your capabilities,
- you want to achieve not just the clarification of the tips, but of a certain shade,
- if you saw the result of the work of a particular barber, and you really liked it, then it definitely makes sense to enroll to it.
Precautionary measures
- Paints, and especially clarifiers, have a strong odor and can cause an allergic reaction - first make a sensitivity test,
- If paint gets into your eyes or mucous membranes, you should immediately rinse them with plenty of running water to avoid burns,
- carefully read the instructions for applying the paint and strictly follow its instructions, otherwise you risk “burn” your hair.
Tamara, 33 years:
I, probably, almost from the age of twenty, began to appear gray hair. Nothing can be done - such a genetics. Therefore, I am a longtime supporter of highlighting, and decided to try balayazh as one of its options.
What can I say? To make it even easier than classic highlighting. By the way, if your hair is soft and not very short, then you should not even try to use mousse to fix the strands prepared for balayazhu - I did not succeed.
Therefore, I fixed my hair with hard rubber bands, and then acted according to the instructions. The result is not bad.

Photos before and after balayazha for short hair.
It is possible that it is more familiar for some hairdressers, but in practice, when performing the balayazh dyeing technique at home, it is more convenient to firmly fasten each of the strands with a barrette or clip, to fix it with an elastic band. Then they will not fall, and it is much more convenient to apply paint on the tips.
Ruslana, 28 years old:
She did balayazh itself home without any experience highlighting. Husband helped. In my opinion, nothing so complicated. The only thing I asked my sister to evenly divide and fasten my hair, but for example, it’s not very convenient to manipulate the hair on the back of my head.
I did not spin the foil, all the strands were separate from each other. So it turned out normal clarified tips, as I wanted.

Photos before and after balayazha on dark hair.
Elena, 31 years old:
My friend helped me to do it. She is a hairdresser at home - everyone she knows and relatives has her hair styled and dyed. True, I didn’t really see the difference between simple highlighting and balancing. But I liked the way my hair began to look.

Photos before and after staining with balagaz technique.
Video about the balayazh staining technique. Detailed accessible lesson from a professional. Balayazh performed on the model with dark hair of medium length.
How to choose the right color?
Having decided to dye your hair in the technique of balayazh, select the desired color. To do this, take into account belonging to the color type.
- Spring - light brown or blue-green eyes, light skin with a blush, light hair. We advise owners of such appearance to look at amber, wheat, honey, beige, caramel and ashy shades,
- Summer - gray eyes with green, brown or blue splashes, ashen or light brown hair and olive skin. Summer girls face most of the cold tones tinged at the ends with pearls or ashes,
- Winter - gray or blue eyes, pale skin, black or dark brown hair. Representatives of the winter color type are ideal coffee, chocolate, walnut, bright chestnut, eggplant, red, burgundy, espresso,
- Autumn - green, gray-blue or golden brown eyes, dark golden skin and red hair. Bright autumn girls should better look at chestnut, chocolate, bronze, caramel, nutty and copper shades.
Tip! Copper shades perfectly fit on light brown hair, while unexpected colors look unusually beautiful on dark hair - blue, yellow or lilac.
Balayazh for short hair
Tinting balayazh for short hair does not require any special skills. We are sure, with this detailed instruction, you can easily cope with this simple task.
- Comb with frequent teeth,
- Brightener
- Luck
- Paint,
- Capacity for mixing formulations
- Towel,
- Shampoo,
- Foil,
- Brush
- Balm.
How to properly perform:
- Stir the strands so that the ends are sticking up.
- For greater reliability, fix the finished structure with a strong varnish.
- Prepare a clarifier.
- Grease them with pieces of foil and attach it to the combed ends. In this case, you need to make sure that the coloring composition does not get to the roots of the strands.
- Wait for the right time - 10-15 minutes (exact dates are shown on the packaging to a particular tool).
- Remove the foil from the hair and rinse them thoroughly.
- Now cook the paint.
- Lubricate the light areas with a tinting compound.
- Wait for the right time - up to 20 minutes.
- Wash your hair with shampoo.
- Take advantage of the balm.
On a note! This option of painting looks just fine even on the shortest haircuts - on the square, pixie and bob.
Balayazh for hair of medium length
Coloring balayazh at home for strands of medium length is even easier than the previous version.
- Comb with rare teeth,
- Brightener
- Rezinochki,
- Paint,
- Capacity for mixing formulations
- Towel,
- Shampoo,
- Brush
- Sponge,
- Balm.
How to properly perform:
- Brush well.
- Divide the hair into separate segments. Tie each with a silicone rubber band.
- Prepare a clarifier.
- With the help of a kitchen sponge you need to fluff the tails, moving down from the gum.
- To make the border soft, make a couple of strokes over the level of rubber bands. This should be done with a brush, holding its tip perpendicular to the hair.
- Wait for the right time - 10-15 minutes (exact dates are shown on the packaging to a particular tool).
- Rinse the tails with water.
- Now cook the paint.
- Lubricate the light areas with a tinting compound.
- Wait for the right time - up to 20 minutes.
- Now cut all the gum.
- Wash your hair with shampoo.
- Take advantage of the balm.
Important! Remember, balayazh staining should not be done more often 4 times a year!
Tips to help you do your own hair coloring technique with balayazh:
Balayazh for long hair
How to perform balayazh at home, if the hair is very long? In this case, you need to go a completely different way.
- Brush,
- Comb with a long thin tip,
- Brightener
- Paint,
- Foil,
- Capacity for mixing formulations
- Towel,
- Shampoo,
- Brush
- Clamps
- Balm.
How to properly perform:
1. Brush well.
2. Separate the hair with a thin tip of the comb.
3. Pin the rest with crabs or a clip.
4. In the separated part you need to select a few strands. Their width can be very different, but not thicker than 2 cm. Curls near the face should be even smaller - 0.5-1 cm.
5. Prepare a clarifier and carefully blot them, stepping back from the root zone of 3-4 cm.
6. A little massage dyed hair with his hands, so that the composition is better absorbed.
7. Wrap the strands in foil.
8. Separate the new part of the hair and repeat the process.
9. Perform the procedure on the remaining segment.
10. Wait 15 minutes.
11. Remove the foil from the hair and rinse them with water.
12. Exactly in the same order toned areas of bleached hair. Apply paint, starting from the tips and gradually moving up. Touch the hair easily, as if stretching the color. Remember, the more careless and relaxed your movements will be, the more beautiful the effect will be.
13. Wait 20 minutes.
14. Wash your hair with shampoo.
15. Use the balm.
Tip! Those who are going to paint the strands themselves, we want to give one piece of advice. If the hair is thick, apply paint with a sponge. It is more convenient to work with a brush on thin and rare strands.
It is interesting! Why choose balayazh and what are its advantages over other types of staining
The positive side of staining balayazh
Advantages of equipment balayazh:
- Looks good on hair of any length and on any hairstyle,
- Suitable for any image and style of clothing,
- Visually, hair appears more voluminous and gets shine,
- You can in this way dye thin hair,
- You do not need to constantly adjust the color (except for short hair).
- Allows you to gently change the image
- Suitable for all ages
- Looks great on dark shades.
There are also disadvantages to this method - it is quite a long time of the procedure, in comparison with the usual coloring, and there is also the difficulty of painting the hair on its own in this way.
Painting procedure
Step-by-step guide staining balayazh:
- Preparation of the dye,
- Then on hair dye is applied without the use of caps, foil, film. First, the ends are painted, selected strands with v-shaped strokes to the roots, and then the entire length,
- From the roots, the dye is “swept away” after 15–20 minutes of application, as a result of which a smooth transition is obtained.
- Next comes the drying and styling of hair.
The dyeing process itself is very complicatedtherefore it is better to contact a qualified master. This is especially true owners of long hairstyles. However, not everyone has the opportunity to go to the salons, so you can try to perform balayazh on their own. Let us consider in more detail how to make balayazh for long and short hair independently at home.
Balayazh staining procedure at home
But how to make balayazh at home? If a woman firmly decided to perform the balayazh technique herself at home, should be patient, prepare everything you need and respect the proportions when painting.
- Special comb with metal tip,
- Bowl for making dye,
- Gloves
- Paint brush,
- Blondorant,
- Oxidant,
- Clamps
- Semi-permanent dye.
Step by Step Instructions:
- Taking a comb, it is necessary to distribute the long hair on the sections: the two upper - occipital zones, the lower occipital, frontal, parietal and two temporal-lateral parts.
- It is necessary to prepare the dye. To do this, mix the blondorant with 1.8-3% oxidant. Their number should be taken on the basis of calculations, so that the lower and frontal parts of the occipital areas can be colored up to the hillock on the nape.
- The very process of staining should begin with the center of the lower occipital zone. It is necessary to take a strand, pull back, holding two fingers. Apply a strip approximately 0.7 in width and up to 10 cm in length with a quick and precise movement with the edge of the brush, not forgetting the root indent of 1–2 cm.
- It is necessary to remove this strand on a spatula and apply a thick layer of paint to the entire width of the strand, leaving a space at the roots of about 8 cm. Then, the borders are daubed using a sponge.
- When all strands that are in this area are processed in the same way and using the same dye composition, only with an oxidizing agent up to 6%, the upper occipital and temporal-side parts should be painted.
- For work with parietal zone must be applied already 6-9% oxidant.
- The paint is aged on the hair for 15 - 20 minutes, then washed off.
- It should be tinted hair in the desired shade, using semi-permanent dye and oxidant up to 3%.
As it can already be seen from the description of the dyeing process, this is a rather laborious process, requiring not only certain skills, but also the ability to think creatively so that all the beauty of balayazh will be revealed on the hair.
Balayazh on short hair
Owners of short haircuts do not have many opportunities to drastically change their style than women with long hair. And this hair coloring is the best way to help refresh your hair. Before you go to the salon, you should seriously consider the choice of the master. The big drawback of doing balayazh on such hair is the inability to hide the unsuccessful strand painting. But if the specialist is really high level, then the hairstyle will look gorgeous.
On short hair, you can safely experiment with colors, because the ends can be easily cut. Still, when choosing a color, you should focus on your color type and remember that bright strands will highlight all the flaws of the skin - it can be pimples, redness, unevenness. If a woman decided to stop on such colors, then her skin should be in perfect condition.
The special feature of short haircuts is that they need constant adjustment for keeping fit, therefore, the staining will have to be carried out quite often.
Tips for dyeing short hair
- Hair should be combed up, and the paint is applied only on the ends. If the dye gets to the roots, then the desired effect will not work.
- To keep the strands better and not fall, you need them thoroughly comb and fix varnish.
- The head is conventionally divided into squares.
- Departing from the roots about 3 cm, dye is applied to the strands.
- Then you need to "stretch" the dye, on hair, to the roots, not forgetting to indent from the scalp.
- After 15-20 minutes of aging, the paint is washed off and a nourishing balm should be applied to the hair.
Note
Technique balayazh - this the dream of many girls, but not always achieved the desired result. To do everything perfectly you need to know a few nuances:
- Coloring should be finished bangs. It should be streaked with thin strands.
- Those who are unsure of their abilities should separate the strands that should not be painted. They are covered with foil or towels.
- Apply the dye should be sure strokes.
- Very carefully worth choose shades. It is necessary that they not only combine with a shade of hair, but also match the color of the skin and eyes. Honey and cream shades are suitable for fair-haired ones, red-haired should choose copper tones, caramel and nut colors are suitable for owners of dark shades.
- You should not try to apply as many shades as possible, two or three will be enough.
- Coloring balayazh should emphasize the hair, so before painting should perform a haircut.
- Although balayaz is pretty sparing type of painting, hair still needs care. The palette gives a lot of options for coloring. This method is suitable for bold creative girls.
This technique is often confused with other ways of highlighting (shatush and ombr). There is practically no significant difference between them, but an experienced master understands the main distinctive features between them. And if he cannot explain the difference to the client, then this is a reason to think about his competence.
When balayazhey only the ends of the hair are lightened, and the composition is applied to the entire length of the hair, which distinguishes it from the shatush method. Due to this, the lower part is clearer, so it resembles the ombra technique. But when balayazheh used shades close to the natural shade of dyed hair. The method of applying the dye in this technique is vertical, so the transitions are smoother than with other techniques.
Balayazh has various ways of execution:
- Color can only tips
- The presence of a clear border in coloring,
- Coloring strands in the face,
- Asymmetric coloring of the strands allows you to give a hairstyle a visually extra volume,
- A special performance balayazha, as a result of which, dyed hair will most closely resemble strands sunburned.
- One of the latest fashion trends is dyeing dark hair tips in bright neon shades.
Owners of dark hair like this technique of dyeing, since the effect of this method on such hair is best seen. But fair-haired girls do not need to neglect such coloring, it is important to choose the right shades. If a girl has blond hair, then it is worth choosing a dye that is closest to their natural shade: golden, wheat, honey. Transitions are not so noticeable, more restrained. If the girl is a golden-haired beauty, then the effect of lightening will be minimal, so you should choose shades a little darker than natural, for example, platinum.
Brunettes who want to give their image more romance and mystery should prefer gold and honey colors. If a girl wants to emphasize individuality, you can choose shades that resemble autumn foliage or any bronze shades.
Although balayazh is a gentle method of dyeing, hair is still subject to chemical attack. They need quality care so that they have a healthy and well-groomed appearance. A qualified master will allow you to choose the perfect shades of hair, taking into account not only the natural color, but also the external type of your client. With the right selection of care products, maintaining the shape of a haircut, balayazh will be beneficial to emphasize all the advantages of hairstyle.
Rating: Not rated
In recent years, naturalness is becoming more and more popular - it has also touched hairdressing. For the apparent simplicity of hair in most cases is the work of the master.
The technique of coloring in the balayazh style, which we describe, belongs to one of the modern trendy highlighting techniques.
Necessary means and tools
Before painting at home, be prepared so that everything is at hand and does not distract from the process.
The following tools and tools will be needed:
- glass or plastic bowl
- flat blade
- brushes for applying the coloring composition
- comb with a long tail,
- hairpins, gum,
- foil or food film, pre-cut into the desired pieces, depending on the length of hair,
- gloves,
- several shades of paint
- bed sheet and towel.

Important to remember! Do not use metal bowls and combs. When interacting with the paint chemical reaction occurs, which will greatly weaken the composition.
Funds to perform balayazha
Paint is better to choose suitable to the natural color and containing moisturizing ingredients. If the hairdresser uses powder dyes, then at home it is better to use cream formulations.
The combination of a dark top and a light bottom and, on the contrary, allows the balayazh technique. Before you begin the procedure, you need to carefully choose a hair dye.
To independently achieve the effect, we buy several shades.. The number of tubes depends on the variety of colors.

If there is only a brightening of the ends or individual strands, then the paint is taken 6–8 tones lighter than the original color. If several shades are used, then each should be two tones lighter.
If the developer is not included in the dye set, then it is better to buy it with a 20% concentration.
Attention! Do not buy developer number 30-50% concentration. It is used by professional hair stylists. Most likely to harm the hair.
When breeding paint, strictly follow the instructions. If in doubt, ask for advice from a sales assistant.
It is better if the paints are of the same manufacturer. The chemical composition is the same, and in the end get an excellent result.
Sold kits with instructions "How to make balayazh at home step by step." They have almost everything you need for the procedure.
 Many brands produce ready-made kits for painting using the balayaz or ombre technique
Buy these cosmetic sets should be, choosing well-known manufacturers who have proven themselves in the fashion world.
Here is several popular professional brands:
- Pallet Inexpensive product for blond hair,
- Estelle Paint that does not leave yellow,
- Garnier The composition of a sufficient amount of moisturizing ingredients
- L'Oreal Releases kits for home use.
Style selection
Using the technique of balayazh, ideally, the hair should look as if they were burned out under the rays of the sun, and shimmer in different shades. therefore Avoid too intense color contrast to eliminate the effect of regrown roots.
The main thing is to choose the right shades so that the transition of the base tone to the light tone is smooth.
There is a lot of information on the Internet, how to do balayazh at home step by step. AND the choice of method and paint depends on the result. It may differ from the work of stylists in the salon, but any woman will achieve the correct approach to such a hair coloring technique.
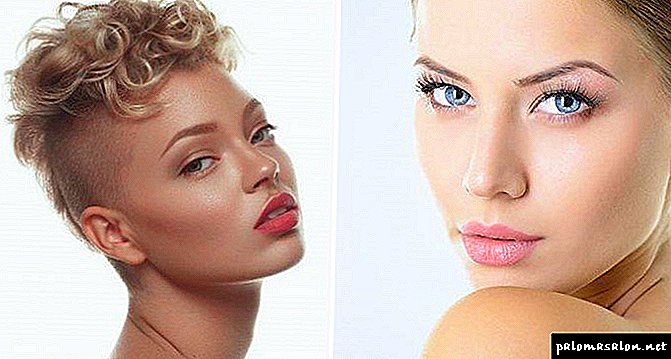
Recommendations for the selection of colors for different color types of appearance:
- For summer color type the combinations "ashen - pearl" and "hazelnut - ashy blond" are more suitable,
- For winter the best is "eggplant or burgundy - blue - black",
- Autumn suggests dark chestnut and bronze colors for dyeing the roots and tips, respectively
- For spring color type the best combination is "bronze - amber".
 Different color types of appearance require the selection of different pairs of colors
Preparing for staining
Before you do balayazh at home, you need to step by step to prepare the hair. First you need to cut your hair, removing all the cut ends, so that after dyeing the hairstyle looked lush and alive.
On straight hair play of light colors are lost.
Because the choice of haircut is also very important. Better this kind of coloring looks on haircuts:
- graduated bob and square on short hair,
- cascade (ladder) for long.
It is better to wash the head the day before, so as not to cause severe damage to the hair.
Smear the exposed skin (forehead, ears, neck) with petroleum jelly or just a greasy cream. This will help to quickly remove the remaining paint when flushing.
The necessary tool should be at hand.
To the chemical composition does not spoil the skin of the hands, the use of gloves.
For long hair
Proceed as follows:
- Long hair carefully comb and divide into four zones (top, occipital and two parietal), fixing each with hairpins or rubber bands.
- From the back curls, dividing into layers or square bunches, apply paint without reaching the hair roots. Move each layer with foil or cling film to change the color only on the selected strands.
- Chel paint as described for short haircuts.
- Wash off after 30 minutes.
 The use of technique balayazh on long hair
Sometimes balayazh technique is used only on certain areas of the head.
So for a hairstyle cut, it is better to paint the tips on the back of the head in the desired color. There is a method of "tail" when the hair is collected in one bundle at the back of the head, and the paint is applied with the help of fingers, with the subsequent distribution of the comb with rare teeth.
You can change the tone of the hair only in the face. Here the locks on the front are painted higher than on the back of the head.
Balayazh in men
The strong floor also began to use this technique. But The length of the haircut should be at least 3 cm.

Before the procedure, the head should be washed with shampoo without conditioner, and then put the hair dryer so that the hair looked up.
Next, gently brush with a special sponge or fingers to apply paint to the tips. After exposure, wash off and make a stylish styling with a hairdryer.
Some with this type of staining create a spectacular, bright image.
Post-painting procedures
Wash off the paint should start with the ends of the hair. Rising to the back of the head, you should quickly and thoroughly remove the entire composition, especially if there is a dark tone. This is necessary so that the color, getting on a lighter, did not have time to react.
Now we use a special shampoo and conditioner for colored hair. Dry better without using a hairdryer. Or choose warm, not hot.
Never brush your wet head with a comb with frequent teeth.Use special formulations to soften hair.
Professional Tips
A few recommendations that should be studied before staining:
- Consult with a specialist for color selection.
- Use paints from the same manufacturer
- Buy shampoos and hair conditioners from one line,
- Take an assistant if you are afraid that you can not cope
- Balayazh better perform on natural hair color,
- Do it no more often 3-4 times a year. The exception is a short haircut,
- This technique makes thin and liquid hair visually much more magnificent,
- Dyed hair needs constant feeding with various medical masks and hair conditioners,
- Effective hairstyle will look with light curls,
- Carefully read the instructions that came with the paint, and test for allergic skin reactions,
- Dilute the paint immediately before use.
Useful video materials about the technique of "balayazh" and other techniques of coloring hair
Ombre, balayazh at home:
How to make an ombre at home:
Dark hair balayazh: technique, step by step photos:
Become irresistible and individual!